Web Accessibility is the practice of creating web content that is usable for those with disabilities, including low or severe vision impairment, colorblindness, deafness or hearing loss, and impaired mobility.
These users utilize tools like screen reader software, enlarged screen resolution, and special computer mice or keyboards to make a website easier to use. Screen reader software like JAWS reads out all the content on the screen in order, and the user can use the keyboard to navigate based on the voice description provided by the software.
In the College of Arts and Sciences Web System we have already included many of the elements needed to make our system accessible. However, in order to maximize our accessibility there are a few things editors can also do to help.
Images
Adding extra contextual content to our image code is the most common way we can help with accessibility. When you insert an image into a post or page, Be sure to fill out the alt text, which should directly describe the content of the image. Here’s an example.
Alt Text: Brad Odhner standing in front of ruins in Athens Greece


Text on Images and Images as Buttons
In general we would prefer that you refrain from writing important text on images at all times. However, if it must be done, please make sure the text is also available elsewhere on the same page and you have also provided alt text for the image.


PDFs
PDFs are not something we often consider when working on accessibility, but PDFs can often provide crucial information to students that is difficult to find elsewhere. In general, your PDF files should follow a logical structure of font sizes and weights.
When you create PDFs from Microsoft Word Documents you need to take a few extra steps to make sure they’re accessible.
On a Mac using Office 2016
Go to File > Save As.
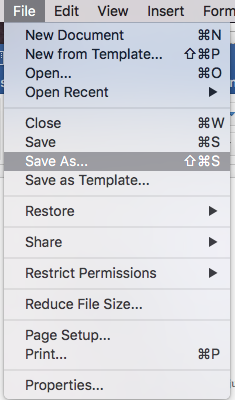
Choose PDF as the file format.
Make sure to select the option that says “Best for electronic distribution and accessibility (uses Microsoft online service). Note: this is only suitable for publicly available information, not for internal or private data.
It will ask you to confirm using the online service to convert your file if you have never used it before. Confirm, and your PDF will be saved.

On Windows using Office 2016
Go to File > Export > Create PDF/XPS

Choose PDF as the file format.
Go to Options near the bottom of the window.

On the new window, look for the section titled Include non-printing information. At the bottom of this section should be a checkbox with the label Document structure tags for accessibility. Check this option.
Confirm and then publish the document to save it.
